|
Pouring Time: 2 minutes
You'll need:
One clean and dry 20-once tulip pint glass

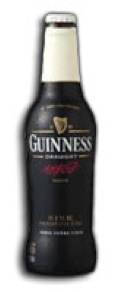
One can or bottle of Guinness Draught, Guinness Stout, Kilkenny Irish Cream Ale, Caffrey's Draught, or Smithwick's Irish Ale
    
Step One: The Glass
Clean and dry the 20 - once tulip pint glass.
A tulip glass allows the bubbles to flow down the sides of the glass, while the wider parts of the glass push the bubbles to the centre to create the head.
Step Two: The Angle
Place the glass at a 45-degree angle under the tap or direction of pour.
If you pour the beer straight down into the glass, the force of the impact will break the nitrogen bubbles and produce a dull taste along with a block of bubbles. Be careful not to let the tap touch the beer or the glass.
Step Three: The Pour
Pour the beer into the angled glass and stop when it is three-quarters full.
Step Four: The Head
Place the glass on top of a flat surface and let it settle.
If you went for a Draught or Cream Ale, you should see beautiful waterfall effect known as the Cascade. The Cascade is actually the nitrogen bubbles flowing down the sides of the glass and up the middle. These tiny nitrogen bubbles collect at the top of the beer and form a white creamy head.
If you tried a Stout or Irish Ale, you'll notice and explosion of foam on the surface of the beer.
This is the most visually stunning part of beer, so take a moment to admire it.
Step Five: The Top-Off
Once it settles, place the glass strait down from the tap and gently fill the rest of the glass.
Experienced bartenders will tweak this step in order to add some Top Art.
You can learn how to make your own Top Art by following the steps in this video.
Step Six: The First Sip
Put the pint to your lips, with your nose almost parallel to the rim, and sip.
Look for the texture, temperature, mouth-feel, and aroma as seen on our reviews.
Reminder: Please recycle and drink responsibly.
Watch these two videos on youtube to compare and get a better understand of the difference between a good and bad pour.
|
